Step 1 - Assess Your Students
You will need to assess your students in order to determine their reading levels. For more information on assessing your students, see the Assessments page.
Step 2 - Group Your Students
Based on your students' assessments, group your students. I group my students based on reading level. This allows me to pull books from our literacy library that are on the instructional level of each child. However, some teachers group based on skill needs. For example, if you have a group of students that are all struggling with main idea, then those students would be placed in a group together. If you choose this method, you will need to make sure that the book level is appropriate for all of the students in the group.
Step 3 - Gather Books
Each group that you work with will need their own set of books, especially if you group your students based on reading level. Each child should have their own book to read from when they are working with you in your guided reading group.
Step 4 - Plan Your Lessons
As with anything else you teach, we must be prepared. There are several lesson plan formats available for guided reading groups. Many of the books and websites provided on the Resources page contain some type of lesson plan format. I happen to use the format contained in Jan Richardson's book, The Next Step in Guided Reading. I did create a form using Microsoft Word that I could just quickly type in information, and choose skills from among drop down menus. Since I teach two classes of students, with five groups in each class, I'm planning lessons for ten different groups. Using the form helps me to save a little time in planning these lessons.
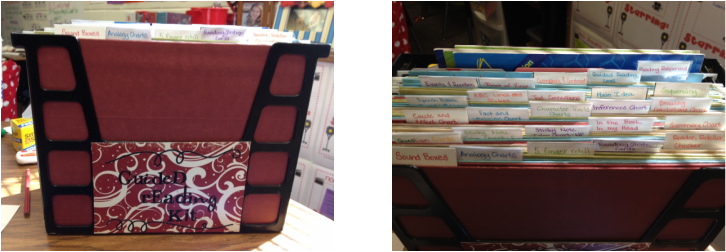
Step 5 - Create Your Lesson Materials
I have a guided reading "kit" that I leave on my guided reading table. This kit is simply a desktop file that contains many different graphic organizers, cards, and other items of this nature that I found in many of the guided reading books or online resources. For example, I have questioning cards, game type spinners with reading skill questions in each section, as well as graphic organizers for skills such as summarizing, character traits, cause and effect, and story elements. I copied each item on colored paper or cardstock and then laminated it so I could use dry or wet erase markers on each form. When I want to work on a skill, I simply pull out the graphic organizer for the skill and we get to work. As a group finishes, we simply wipe it off and I am able to place it back in the kit for use with another group at a later time.